# Coupa OAuth 2.0 connection setup
Coupa (opens new window) connector supports OAuth 2.0 based connectivity since Jan 2022. OAuth connections are more secure than API key based connections, and with OAuth, users can provide the exact scopes that they would like Workato to use in the connection settings. For more details on OAuth connectivity, please visit the Coupa documentation (opens new window).
# How to connect to Coupa with OAuth 2.0
You must create an OAuth 2.0 client in Coupa before you can connect to Coupa in Workato. Complete the following steps to set up the client in Coupa and configure your Coupa connection in Workato:
Sign in to your Coupa instance. For example: https://[your-instance-name].coupacloud.com/oauth2/clients
Go to Setup > Integrations > OAuth2/OpenID Connect Clients.
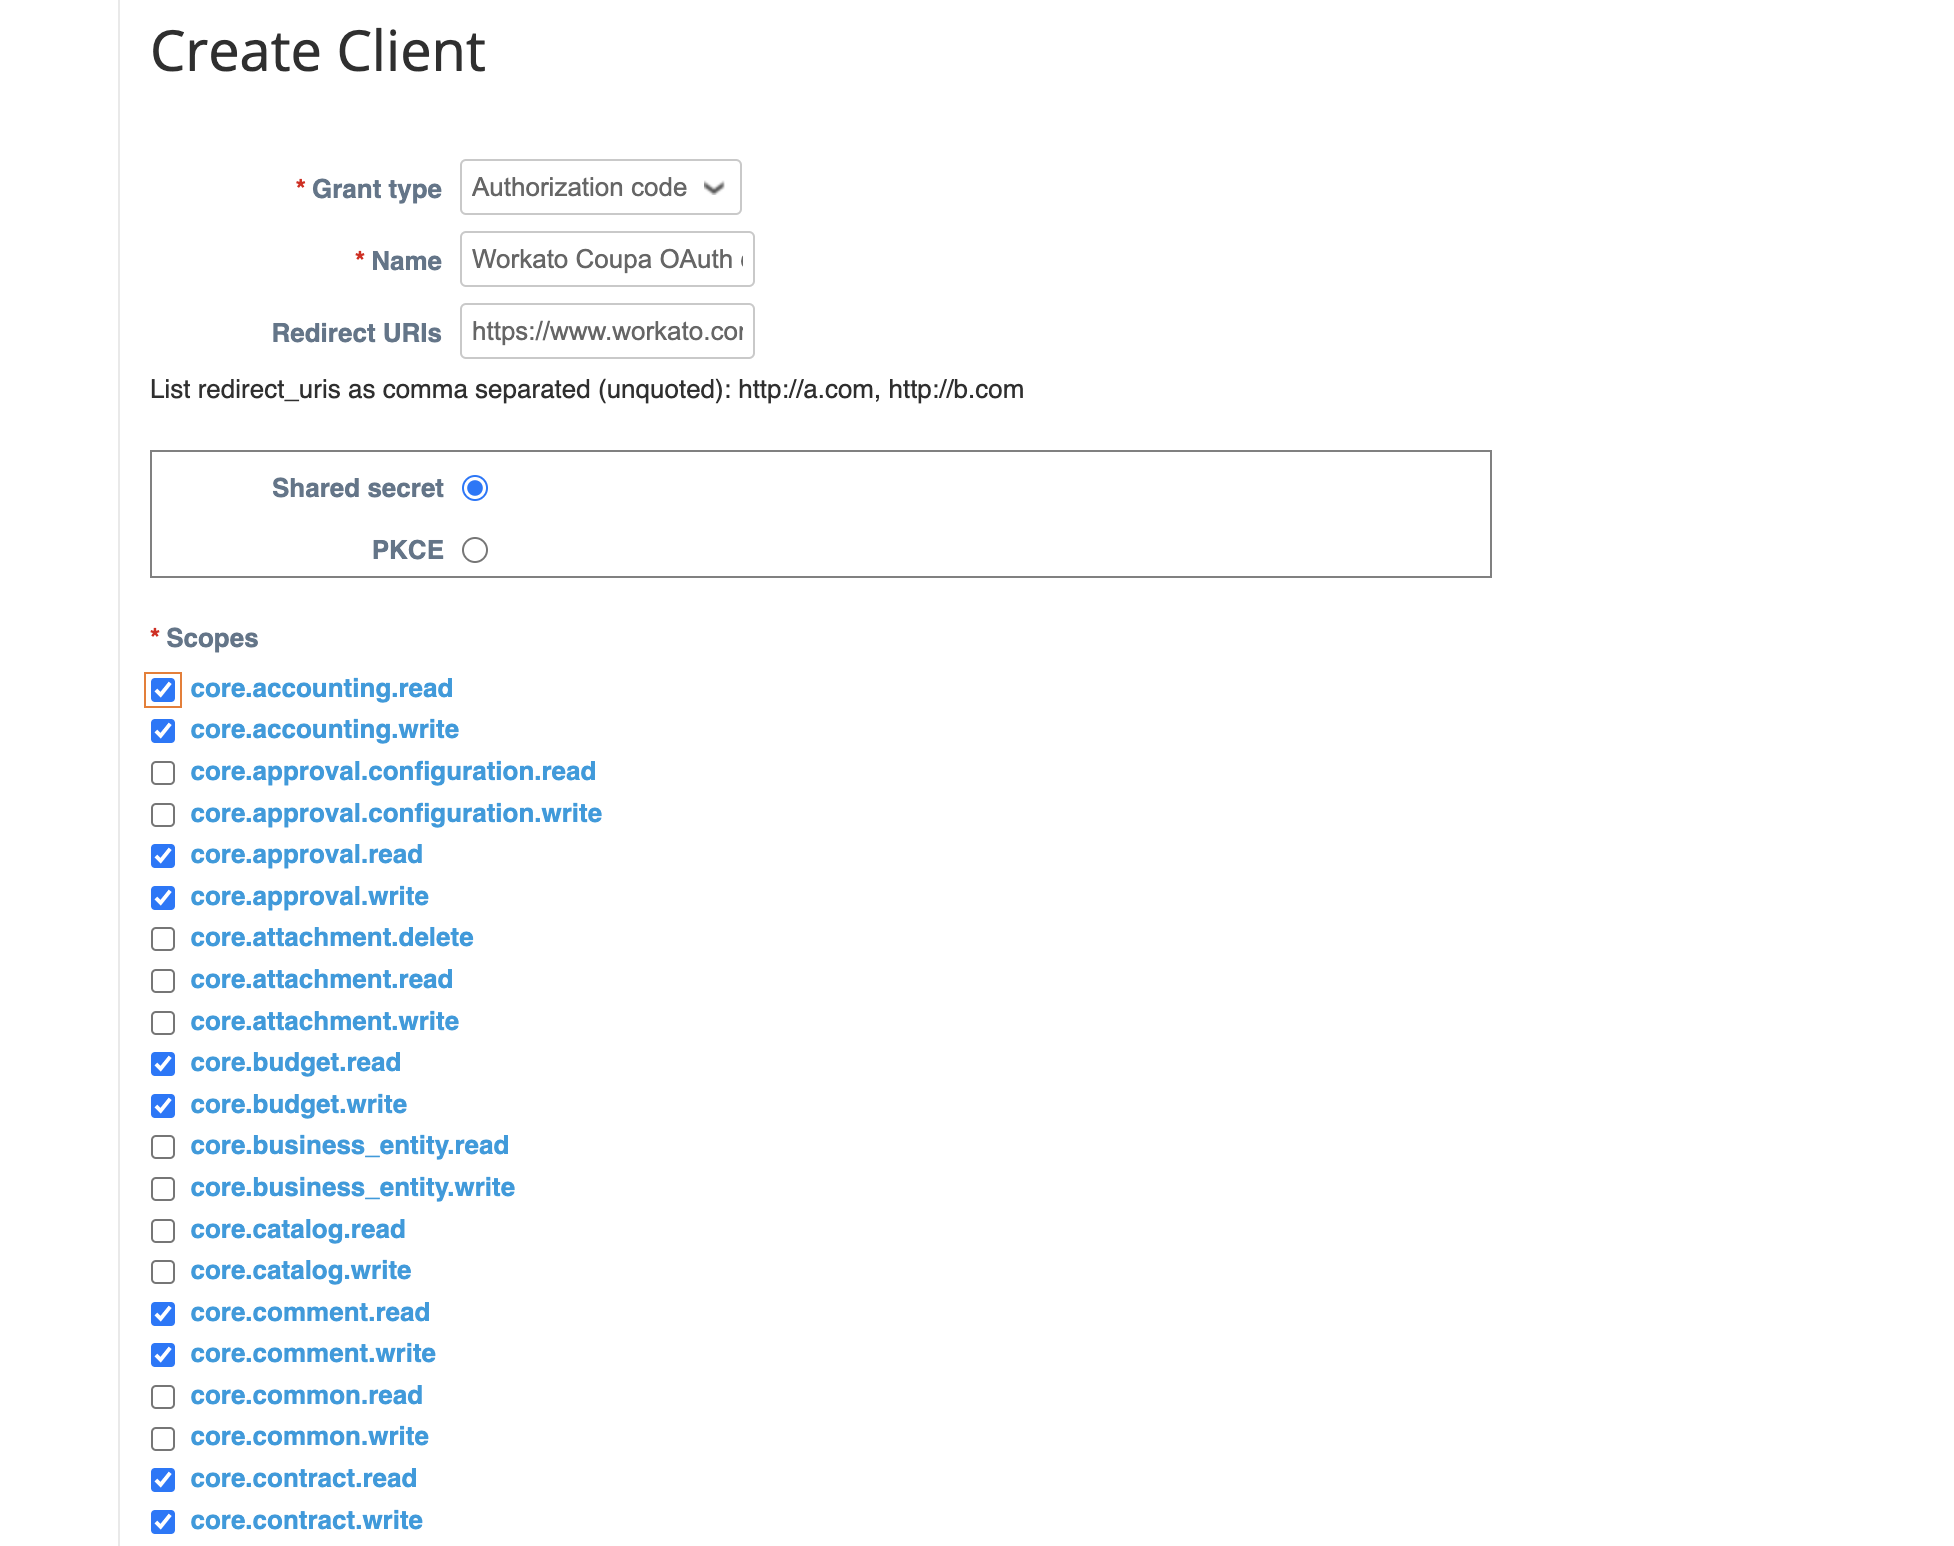
Click Create to create a new OAuth client.
Use the Grant type drop-down menu to select Client credentials or Authorization code. You must select the same option in Workato for the Authentication type.
Provide a name in the Name field. For example: Workato Coupa OAuth connection.
Enter the redirect URIs you plan to use in the Redirect URIs field.
Add the link https://www.workato.com/oauth/callback if you plan to use Authorization code.
Provide a login and valid contact details under Client credentials. Include the contact's first name, last name, and email.
Select the scopes you plan to provide to Workato. Include all objects and features you plan to automate with the Coupa connector. These scopes must match the ones you configure in Workato. You must include the core.common.read scope to establish a connection.
 Create a new client
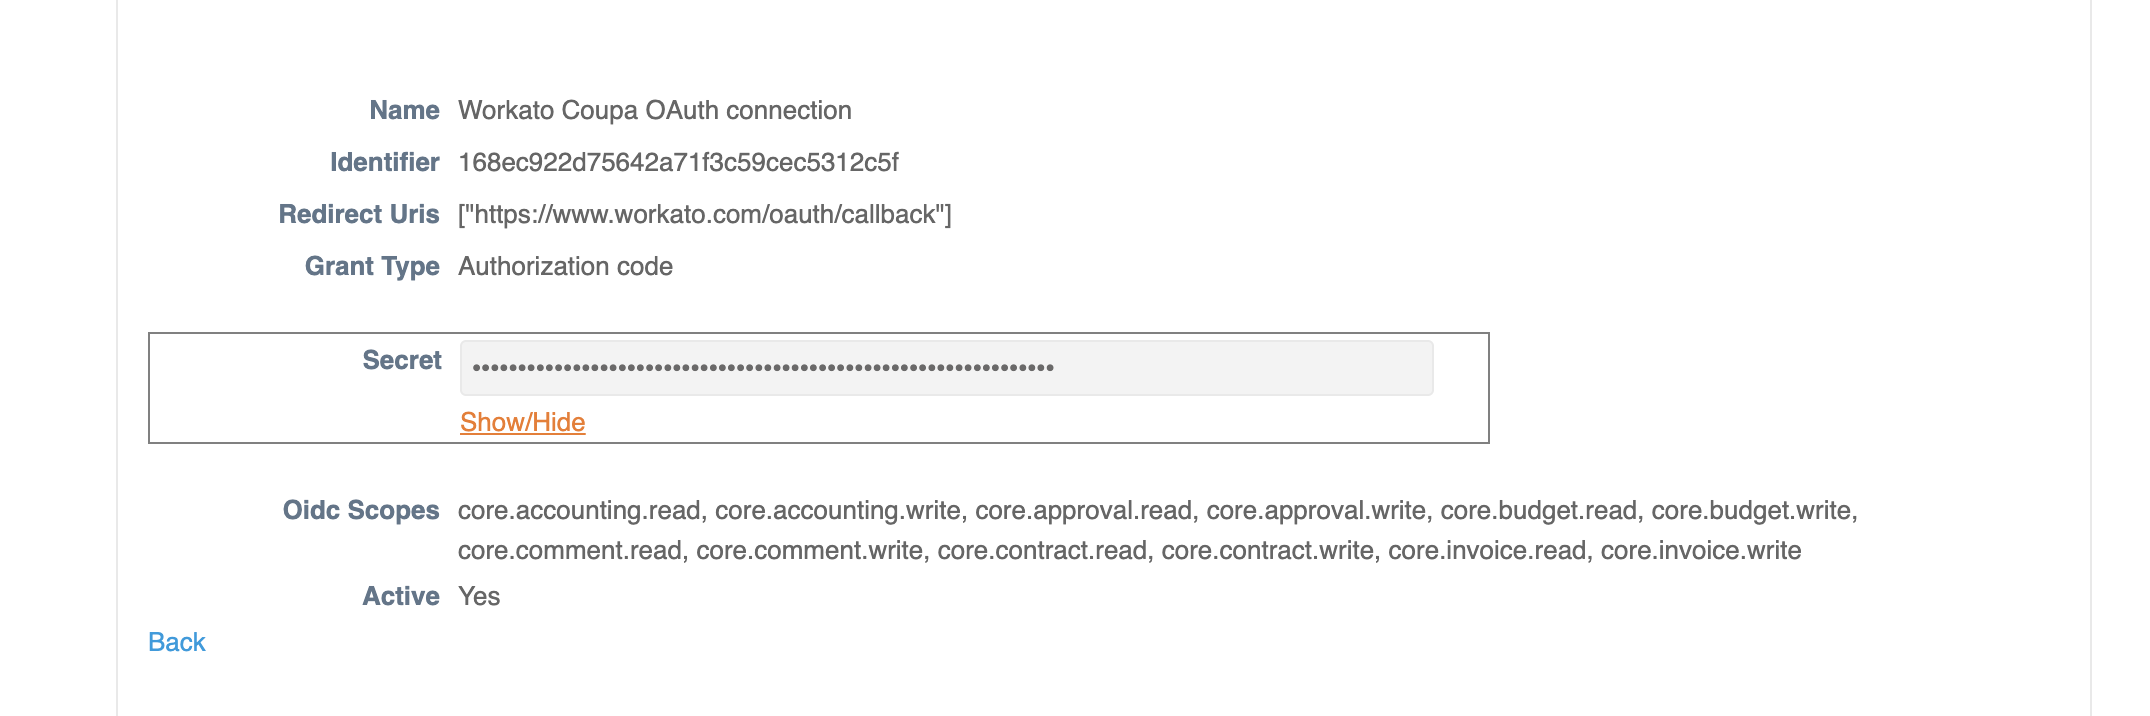
Click Save.
Copy and store the Identifier and the Secret for use in Workato.
 Save your connection details
Return to your Workato account and go to the project where you plan to add your connection.
Click Create > Connection.
Search for and select Coupa on the New connection page.
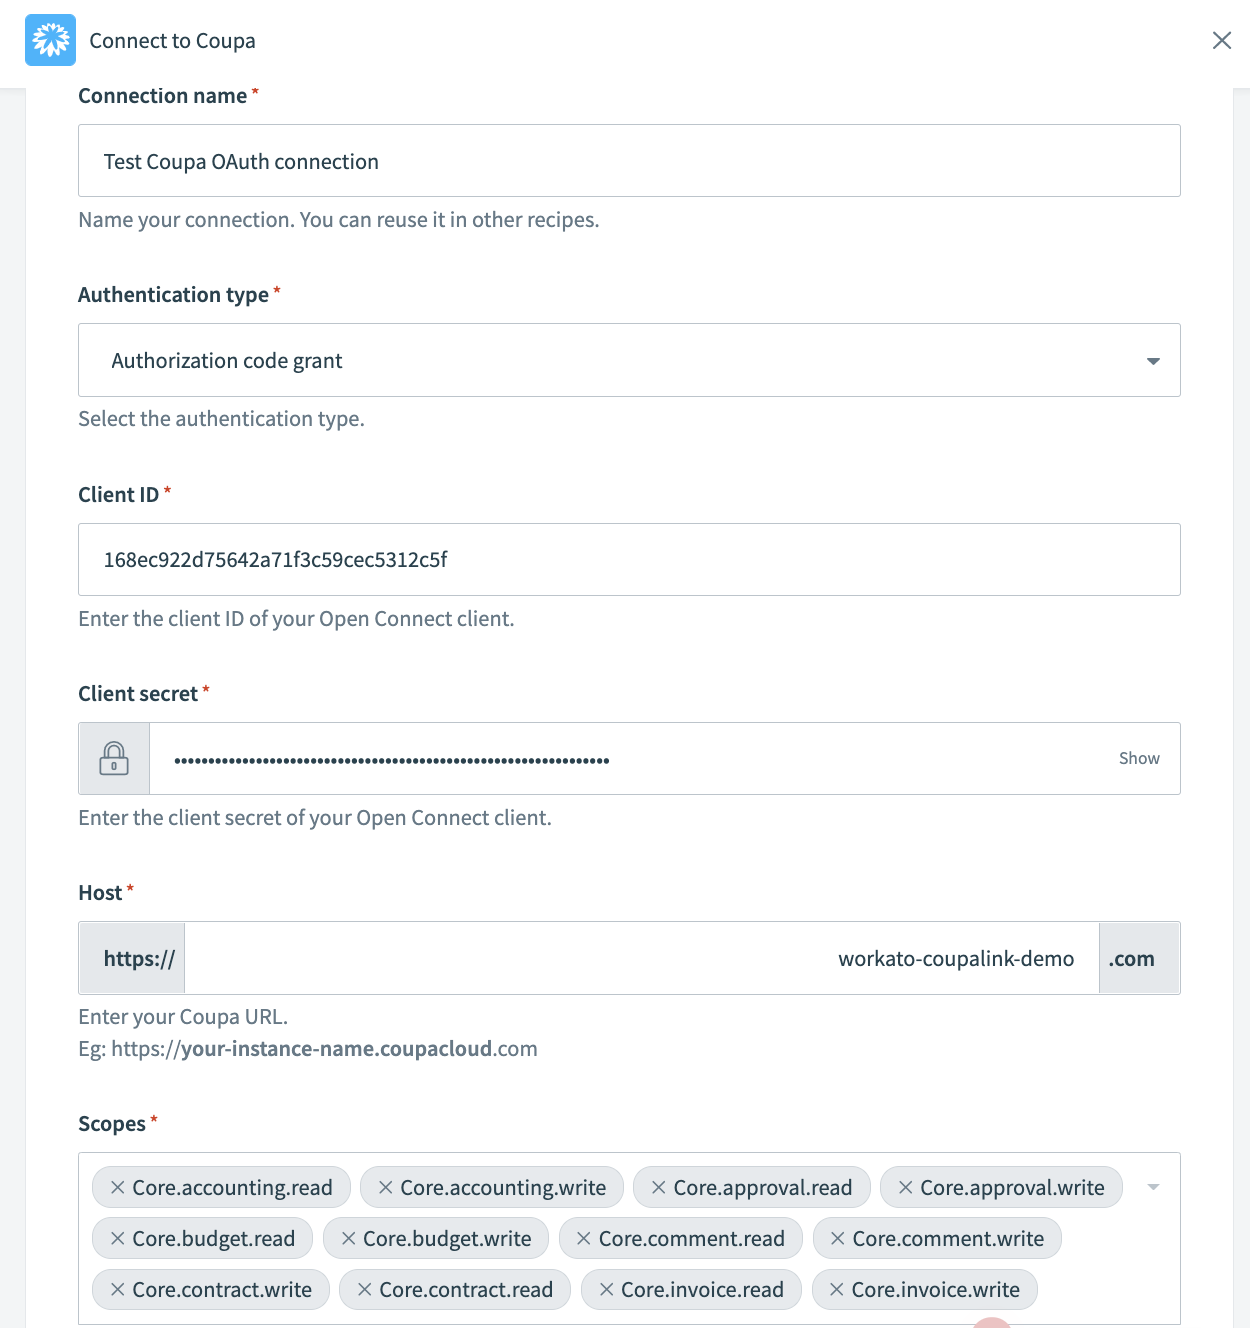
Enter a name for your connection in the Connection name field.
Use the Location drop-down menu to select the project or folder to store your connection.
Use the Authentication drop-down to select the Grant type provided in Coupa.
Provide your client ID in the Client ID field.
Provide your client secret in the Client secret field.
Enter the Coupa URL for your instance in the Host field. For example, enter acme if your URL is http://acme.coupacloud.com.
Go to the Scopes section and select the same scopes you configured in Coupa. Include the required scope core.common.read to connect successfully.
 Coupa connector connection settings for OAuth 2.0
Click Connect.
Last updated: 1/27/2026, 11:15:38 PM