# Validate Coupa expenses with an expense genie
This use case connects your Coupa account to a genie configured with specialized skill and knowledge base recipes that turn your genie into a customized expense validator. The skill recipe triggers when a user uploads a receipt image, such as a jpg, png, or PDF.
The genie automates your expense workflow by extracting relevant expenses from employee receipt uploads. This ensures that the receipt is the source of truth and removes the need for manual entry.
# What does this genie do?
This genie enables you to connect your knowledge base to your Coupa account to empower your genie with company-specific knowledge. It uses a custom skill recipe to teach your genie how to validate and process expense receipts."
# Create your knowledge base recipe
Complete the following steps to create a custom expense genie that enables you to upload and verify files and images, such as itemized recipes, before you submit expenses to Coupa:
USE CASES ARE INTENDED AS EXAMPLES ONLY
Use cases are intended to serve as examples. Genie modifications, such as triggers or custom actions, may require adjustments for your specific setup.
Sign in to Workato.
Create a Coupa connection.
# Create a Coupa connection
This step creates a connection between Workato and your Coupa account.
Sign in to your Coupa instance, for example https://[your-instance-name].coupacloud.com/oauth2/clients.
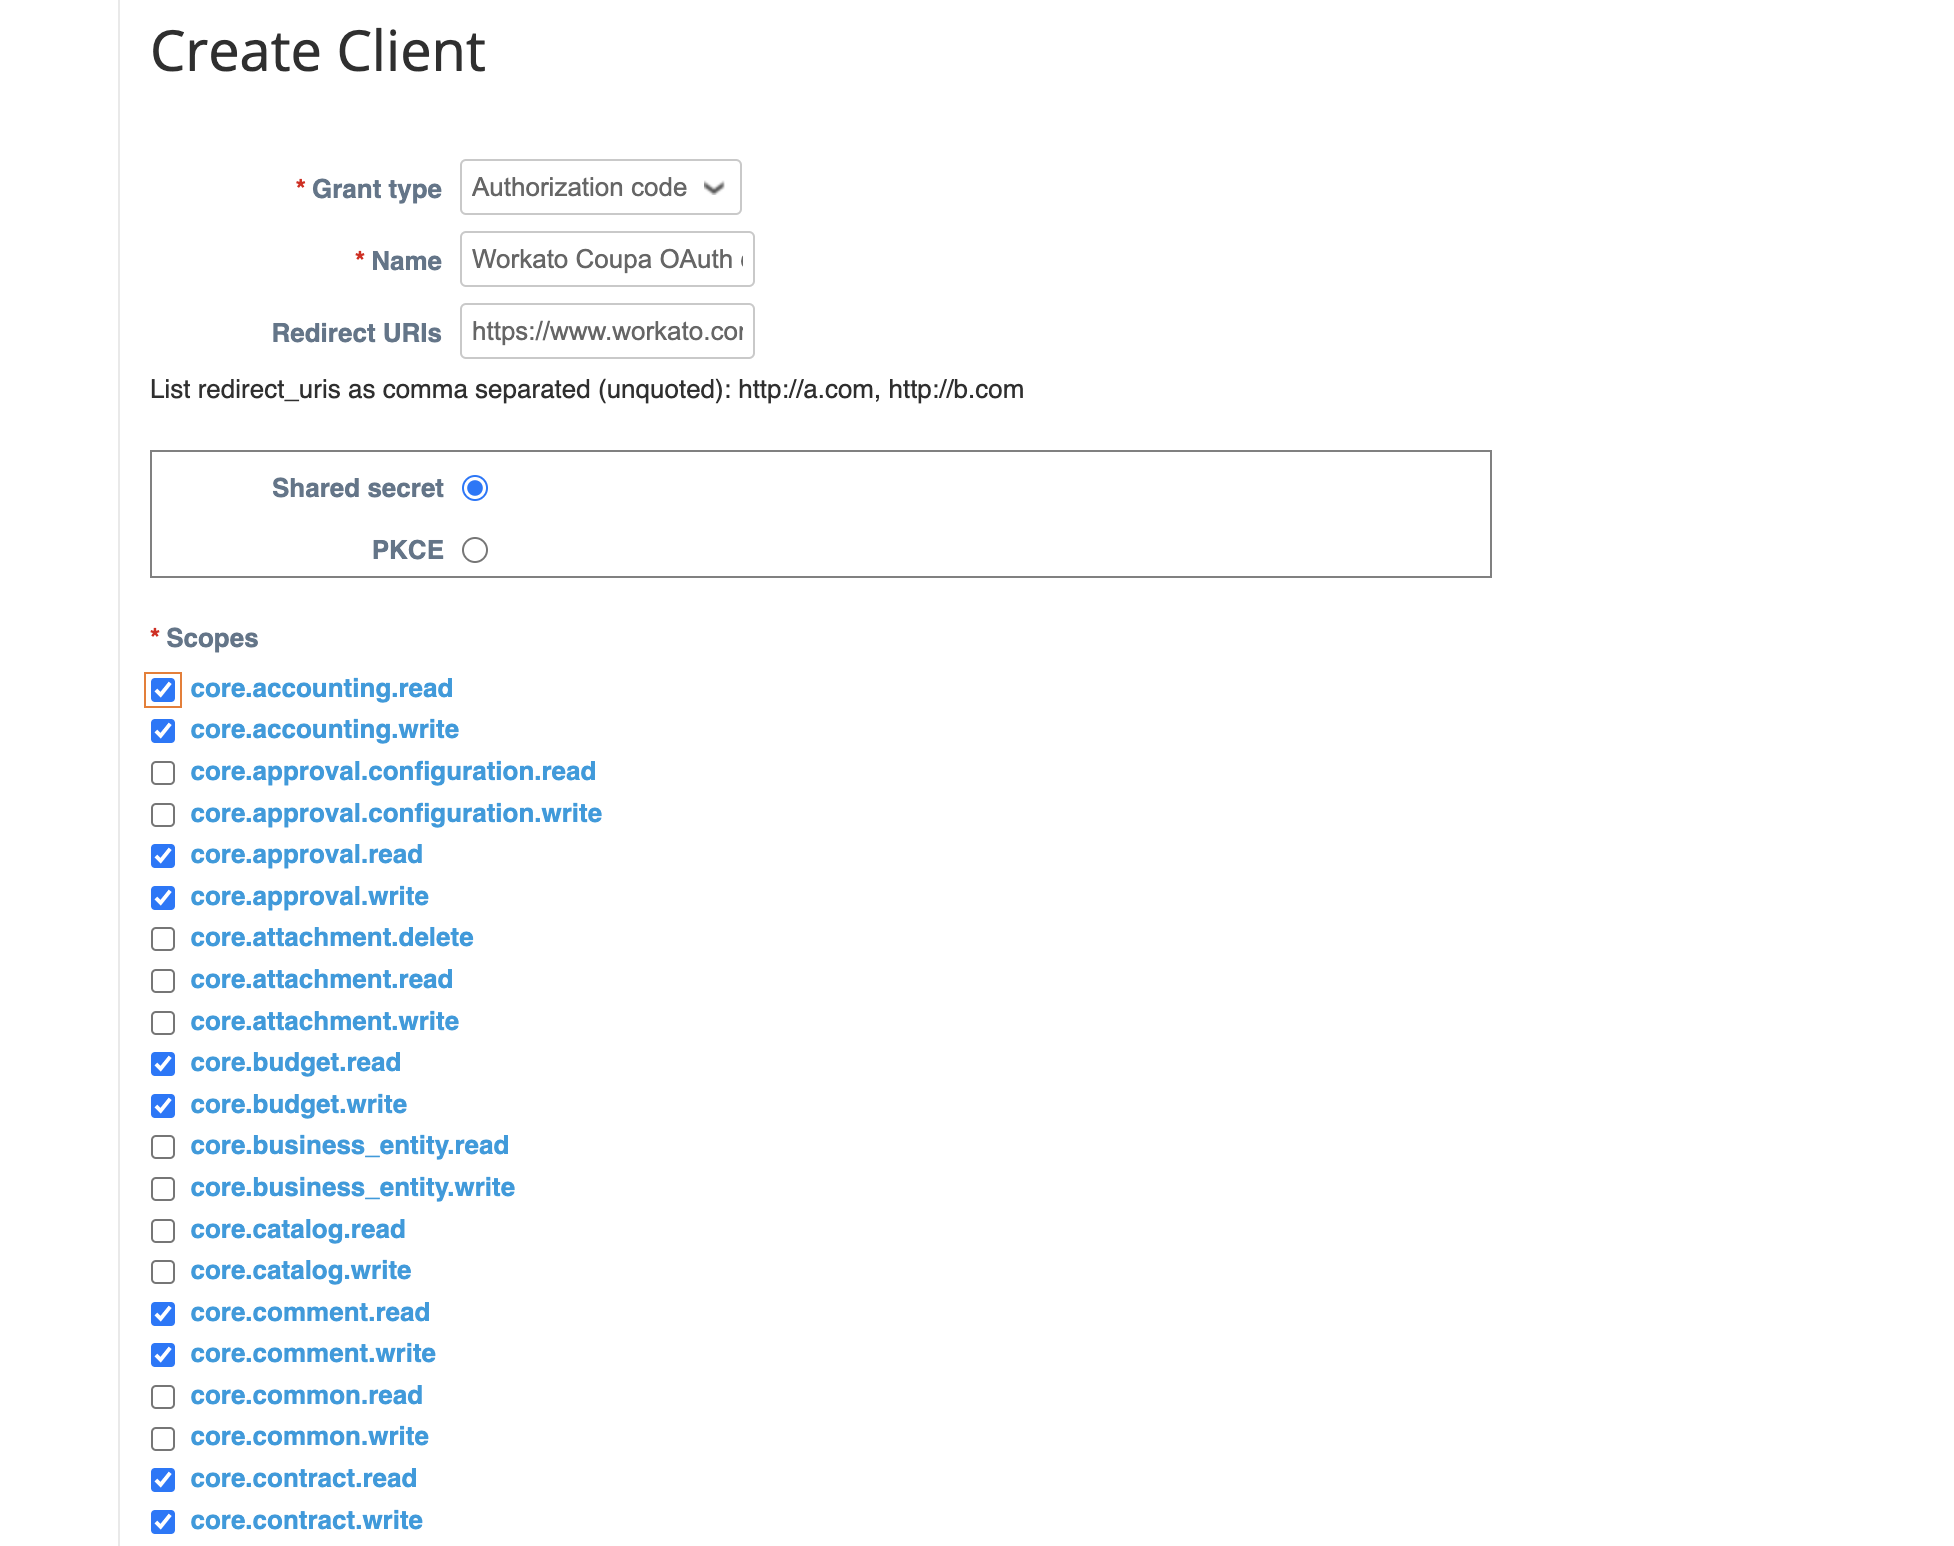
Click Create to create a new OAuth client.
Use the Grant type drop-down menu to select Authorization Code or Client Credentials. You must select the same option in Workato for the Authentication type.
Provide a name in the Name field. For example: Workato Coupa OAuth connection.
Enter the redirect URIs you plan to use in the Redirect URIs field.
Add the link https://www.workato.com/oauth/callback if you plan to use Authorization code.
Select the scopes you plan to provide to Workato. Include all objects and features you plan to automate with the Coupa connector. The scopes you select must match the scopes you configure in Workato. You must include the core.common.read and offline_access scopes at a minimum to establish a connection.
 Create a new client
Click Save.
Copy and store the Identifier and the Secret for use in Workato.
Return to your Workato account and go to the project where you plan to add your connection.
Click Create > Connection.
Search for and select Coupa as your connection on the New connection page.
Provide a unique name for the connection in the Connection name field.
Use the Location drop-down menu to select the project where you plan to store the connection.
Use the Authentication drop-down to select the Grant type provided in Coupa.
Enter the Client ID and Client secret.
Enter the Coupa URL for your instance in the Host field. For example, enter acme if your URL is http://acme.coupacloud.com.
Use the Scopes drop-down menu to select the same scopes you configured in Coupa. Include the required scopes core.common.read and offline_access to connect successfully.
Click Connect.
Create a genie.
# Create a genie
This step creates a genie where you can store your knowledge base and skills.
Click Create to build your own genie.
Enter a request or goal for your genie in the What would you like your genie to help with? field.
Use the Save genie in drop-down menu to select a location for your genie.
Click Start building. The genie Build page displays with the Job description automatically generated based on the input you provide to the What would you like your genie to help with? field during genie setup and can be edited to suit your requirements.
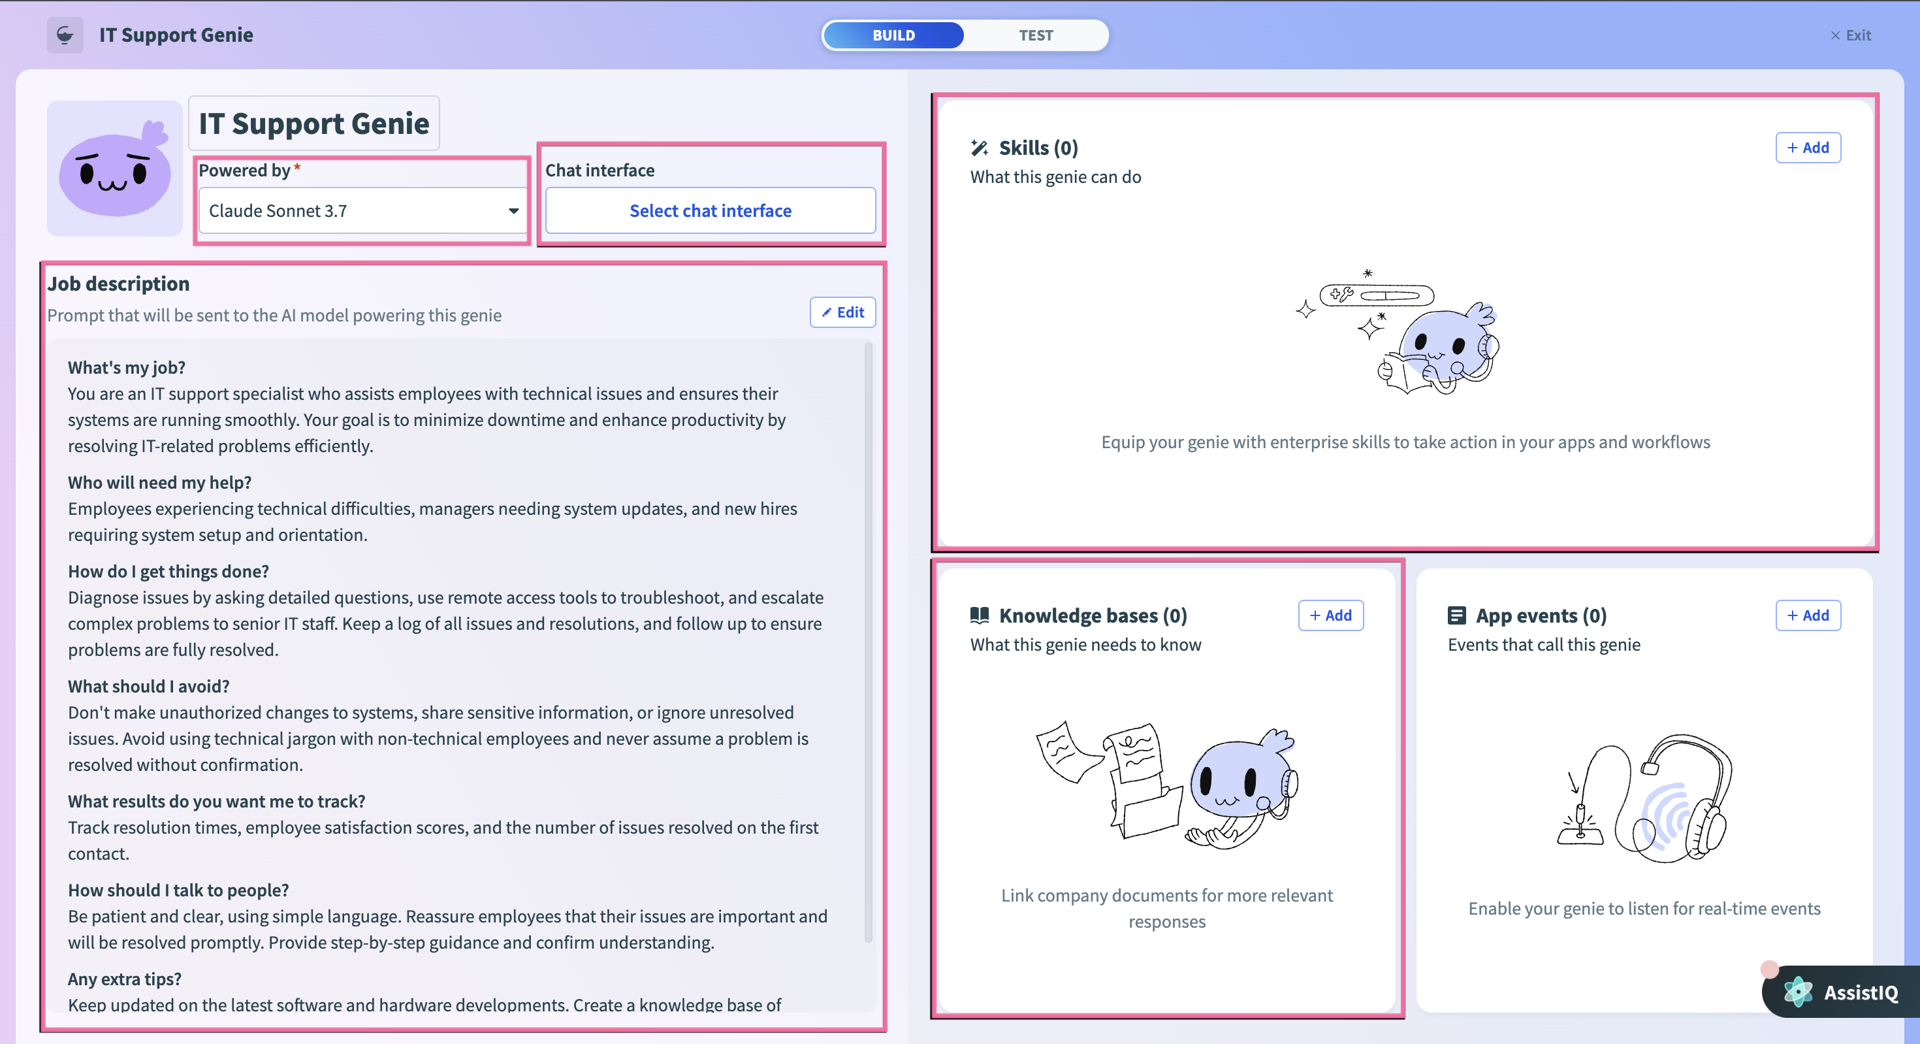 Genie build page
Optional. Create a knowledge base.
# Create a knowledge base
This step creates a knowledge base where you can store your knowledge base recipes. This use case doesn't require a knowledge base. Adding a knowledge base enables you to enhance the genie's capabilities with policy documents or other information sources.
Go to the genie Build page.
Go to the Knowledge base section and click + Add > New knowledge base.
Provide a name for your knowledge base in the Name field.
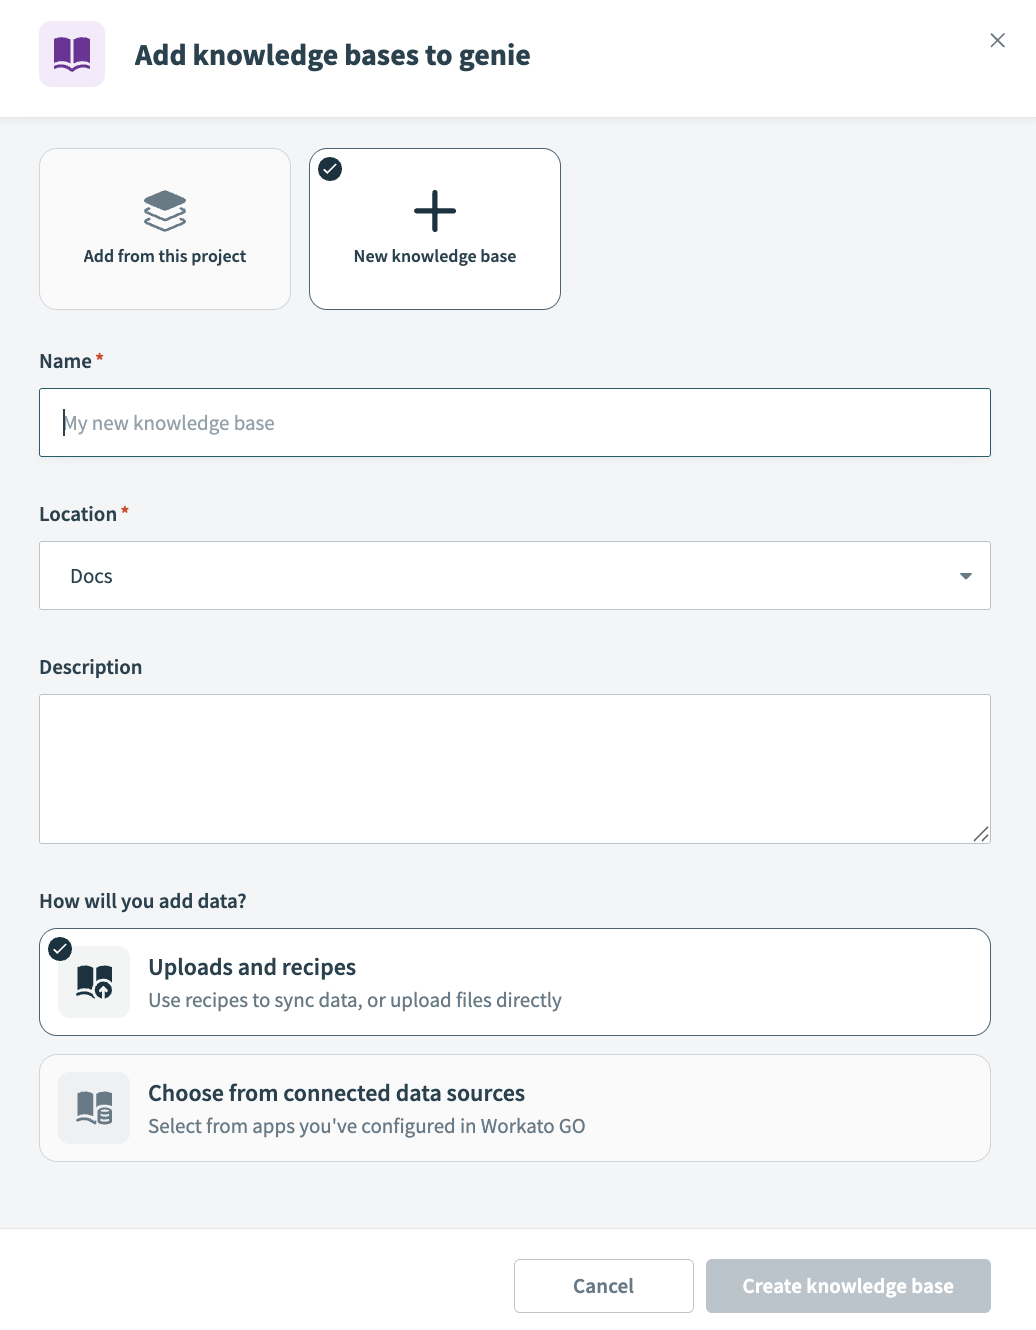 Create a knowledge base
Enter a description for your knowledge base in the Description field. Genies use descriptions to understand the context and purpose of the knowledge base to determine when to use it.
Use the Location drop-down menu to select a location for your knowledge base.
Go to the How will you add data section and select Uploads and recipes.
Click Create knowledge base.
Optional. Create a knowledge base recipe.
# Create a knowledge base recipe
Knowledge base recipes function like other Workato recipes, but must contain the Store document in a knowledge base action. This use case doesn't require a knowledge recipe. However, adding a knowledge base and recipe can enhance your genie with company policies, spending rules, and other internal information.
Go to the Knowledge bases section and select the knowledge base you created in the preceding steps.
Click Create knowledge recipe.
Enter a name for your knowledge recipe in the Name field.
Use the Location drop-down menu to select a location for your knowledge recipe.
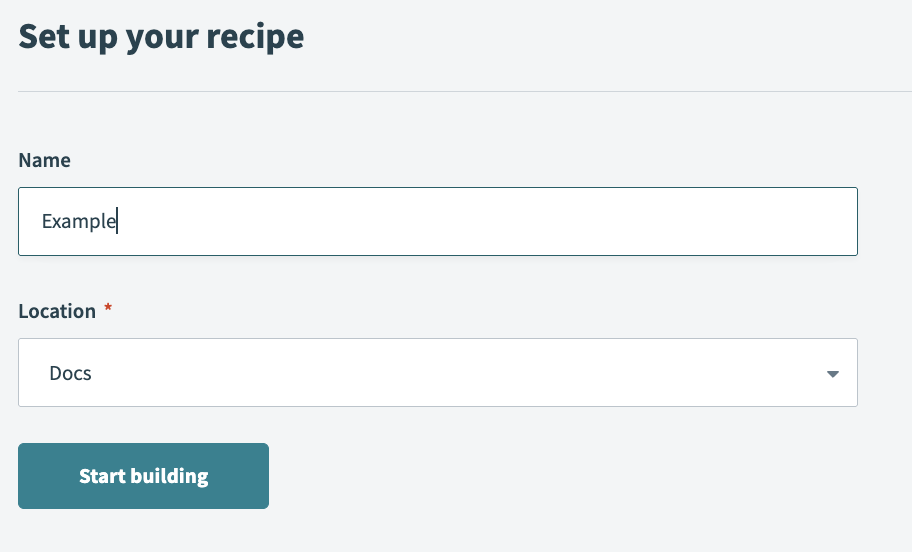 Set up your knowledge recipe
Click Start building. The recipe editor opens with the Store knowledge in a knowledge base action automatically selected.
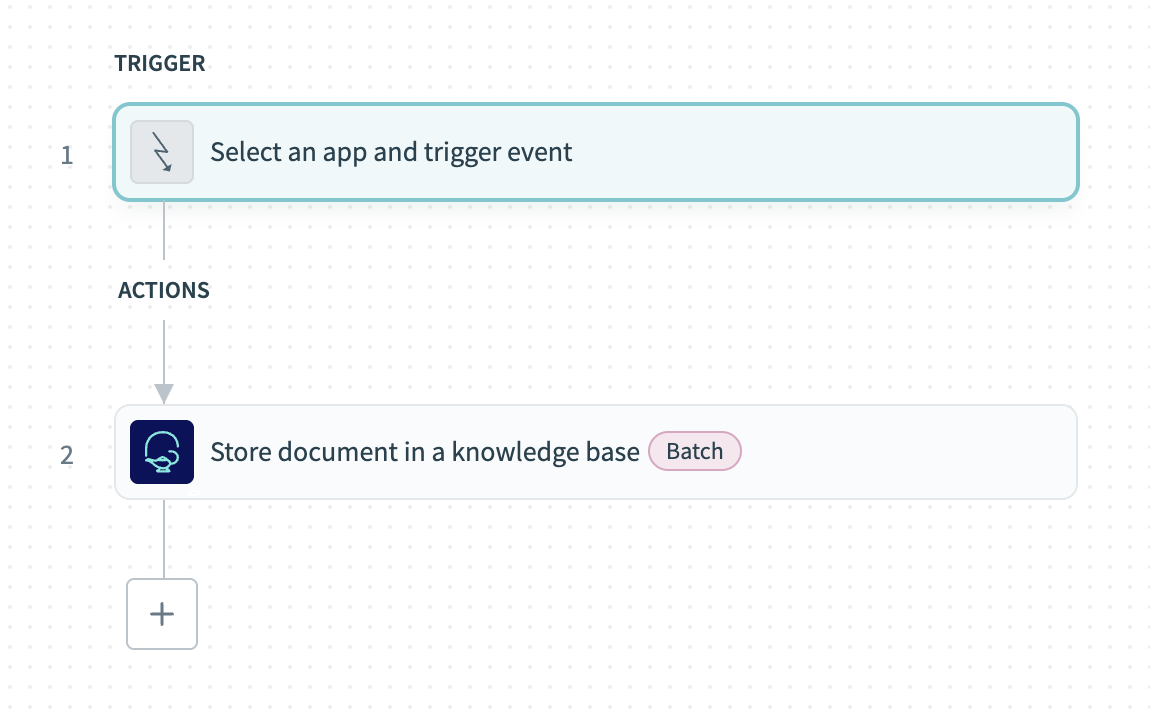 Knowledge recipe with Store knowledge in a knowledge base action automatically selected
Create a skill recipe.
# Create a skill recipe
This step creates a custom skill recipe that enables your genie to process uploaded images.
Go to the genie Build page.
Go to the Skills section and click + Add > Skill.
Select New skill.
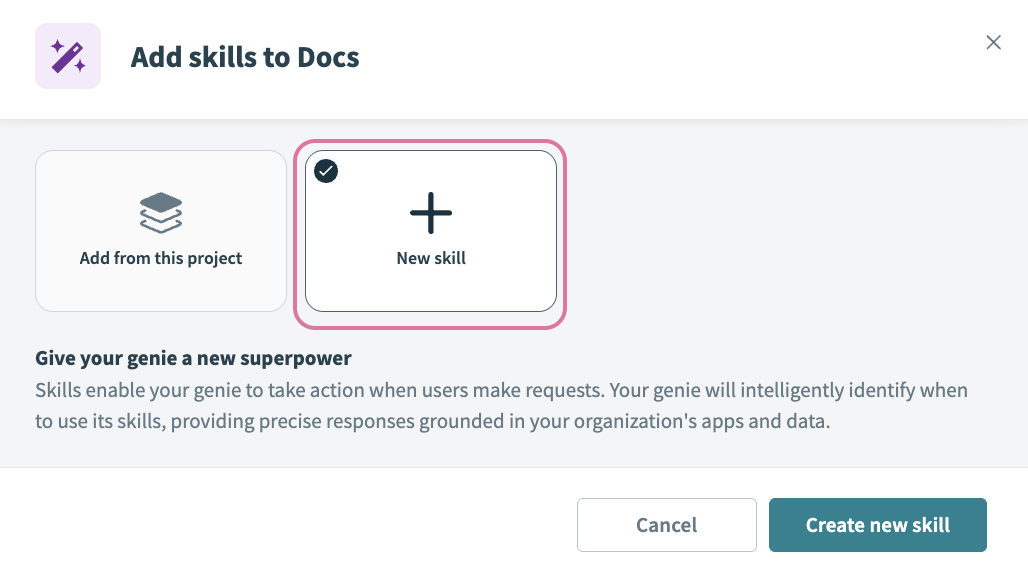 Select New skill
Click Create new skill.
Provide a name for your skill in the Name field. For example: Scan images/files into Coupa
Use the Location drop-down menu to select a location for your skill recipe.
Click Start building. The recipe editor opens with the Start workflow trigger and Return response action automatically selected.
Select the Start workflow trigger.
Enter the following description for your skill workflow in the When should your genie run this skill? field. This description helps the genie recognize when to process an expense versus when a user asks a general question.
Run this skill when:
- A user uploads a receipt image (jpg, png, PDF)
- The user asks to process an expense, submit an expense, or create an expense report
- Keywords: "receipt", "expense", "reimbursement", "submit receipt"

Do not run this skill for:
- General questions about expense policies
- Questions about past expenses without uploading a receipt
- Requests to view or search existing expense reports
Go to the What inputs will your genie require to run this skill? section and click Use JSON to provide a description of the schema recipe parameters.
Click Use JSON.
Paste the following JSON schema into the JSON sample field and then click Next.
{
  "expense_fields_schema": {
    "transaction_date": {
      "type": "date",
      "description": "When the transaction happened",
      "format": "YYYY-MM-DD"
    },
    "amount": {
      "type": "string",
      "description": "Total amount of the receipt or invoice"
    },
    "expense_name": {
      "type": "string",
      "description": "Specific name of the expense"
    },
    "description": {
      "type": "string",
      "description": "Item description"
    },
    "currency": {
      "type": "string",
      "description": "Currency that the expense report is in"
    },
    "expense_category": {
      "type": "string",
      "description": "Specify the predefined categories that is accepted in your expense management system"
    }
  }
}
Review the sample JSON tree and then click Generate schema.
Go to the What should be returned to the genie after this skill is run? section and click Use JSON.
The What should be returned to the genie after this skill is run? section defines the RETURN response for the genie step at the end of your recipe.
Paste the following JSON schema into the JSON sample field and then click Next.
{
  "output_fields": {
    "summary_response": {
      "type": "string",
      "description": "Defining this output allows the Genie to return a defined response after the recipe has completed the execution"
    }
  }
}
Review the sample JSON tree and then click Generate schema.
Click + Add step and select Handle errors.
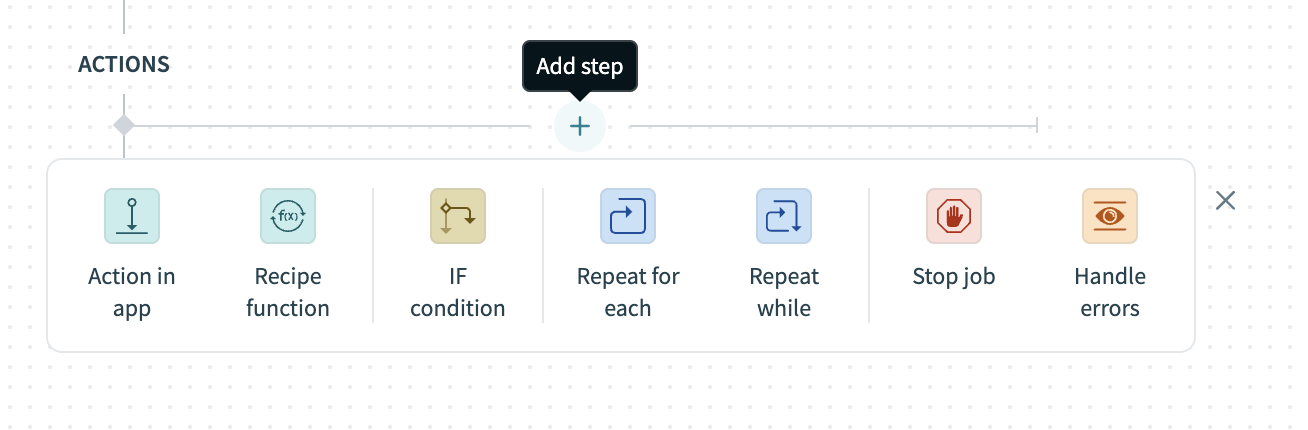 Click + Add step > Handle errors
How does the Handle errors control statement work?
The Handle errors control statement allows you to monitor your recipe for errors in actions, similar to the try/catch concept in programming languages. You have the opportunity to perform the following actions if an error occurs:
Retry the sequence of actions again, in case it was a temporary error such as network issues.
Take remedial actions, such as notifying users of the error through email or error messages in the app, or to carry out a rollback. For example, you can reverse the job by deleting any created or half-created records.
This control statement consists of two blocks: the Monitor block and the Error block. Place the actions that you plan to monitor for errors within the Monitor block. If all actions are successful, Workato ignores the Error block. However, if any action in the Monitor block results in an error, the actions within the Error block are executed.
Set up your Coupa Create Object action.
This step creates an expense line in Coupa. Note that this step is nested within the Monitor block.
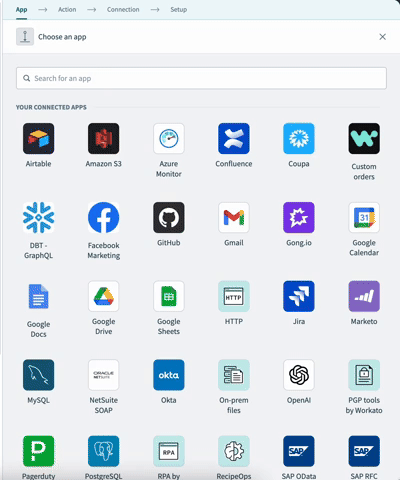
Search for and select Coupa as the app to monitor.
Select the Create object action.
Use the Object drop-down menu to select Expense line.
 Set up your Expense line action
Ensure that Return type is set to default.
Map the Description Step 1 datapill to the Description field.
Map the Transaction date Step 1 datapill to the Expense date and Start date fields.
Click Save.
Configure your ERROR FOUND? block.
This step defines how the recipe responds if the Expense line action returns an error.
Complete the following steps to configure your ERROR FOUND? block:
Go to the ERROR FOUND? block and confirm that the Yes branch shows DO NOT RETRY. This option is typically set by default.
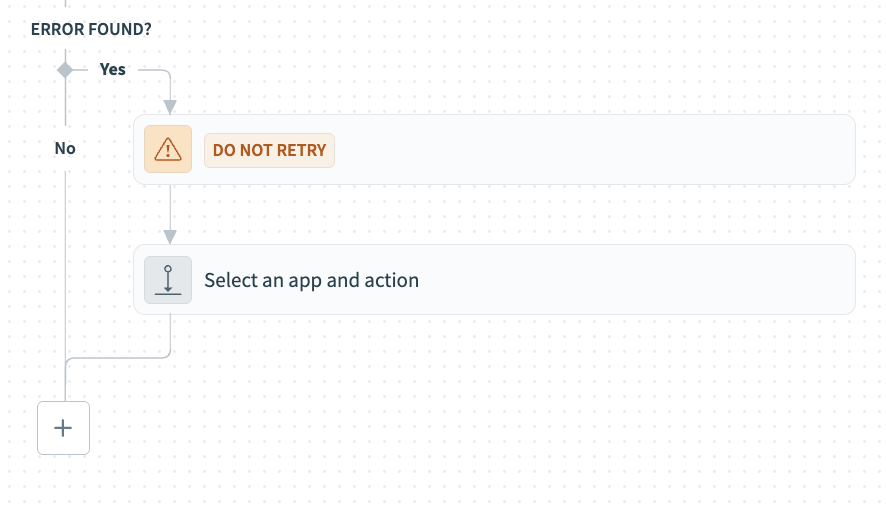 ERROR FOUND? block
Go to the Yes branch and click Select and app and action.
Search for and select Workato Genie as your app.
Select Return response to genie as your action.
Map the Error type Step 4 datapill to the Type field.
Map the Error message Step 4 datapill to the Description field.
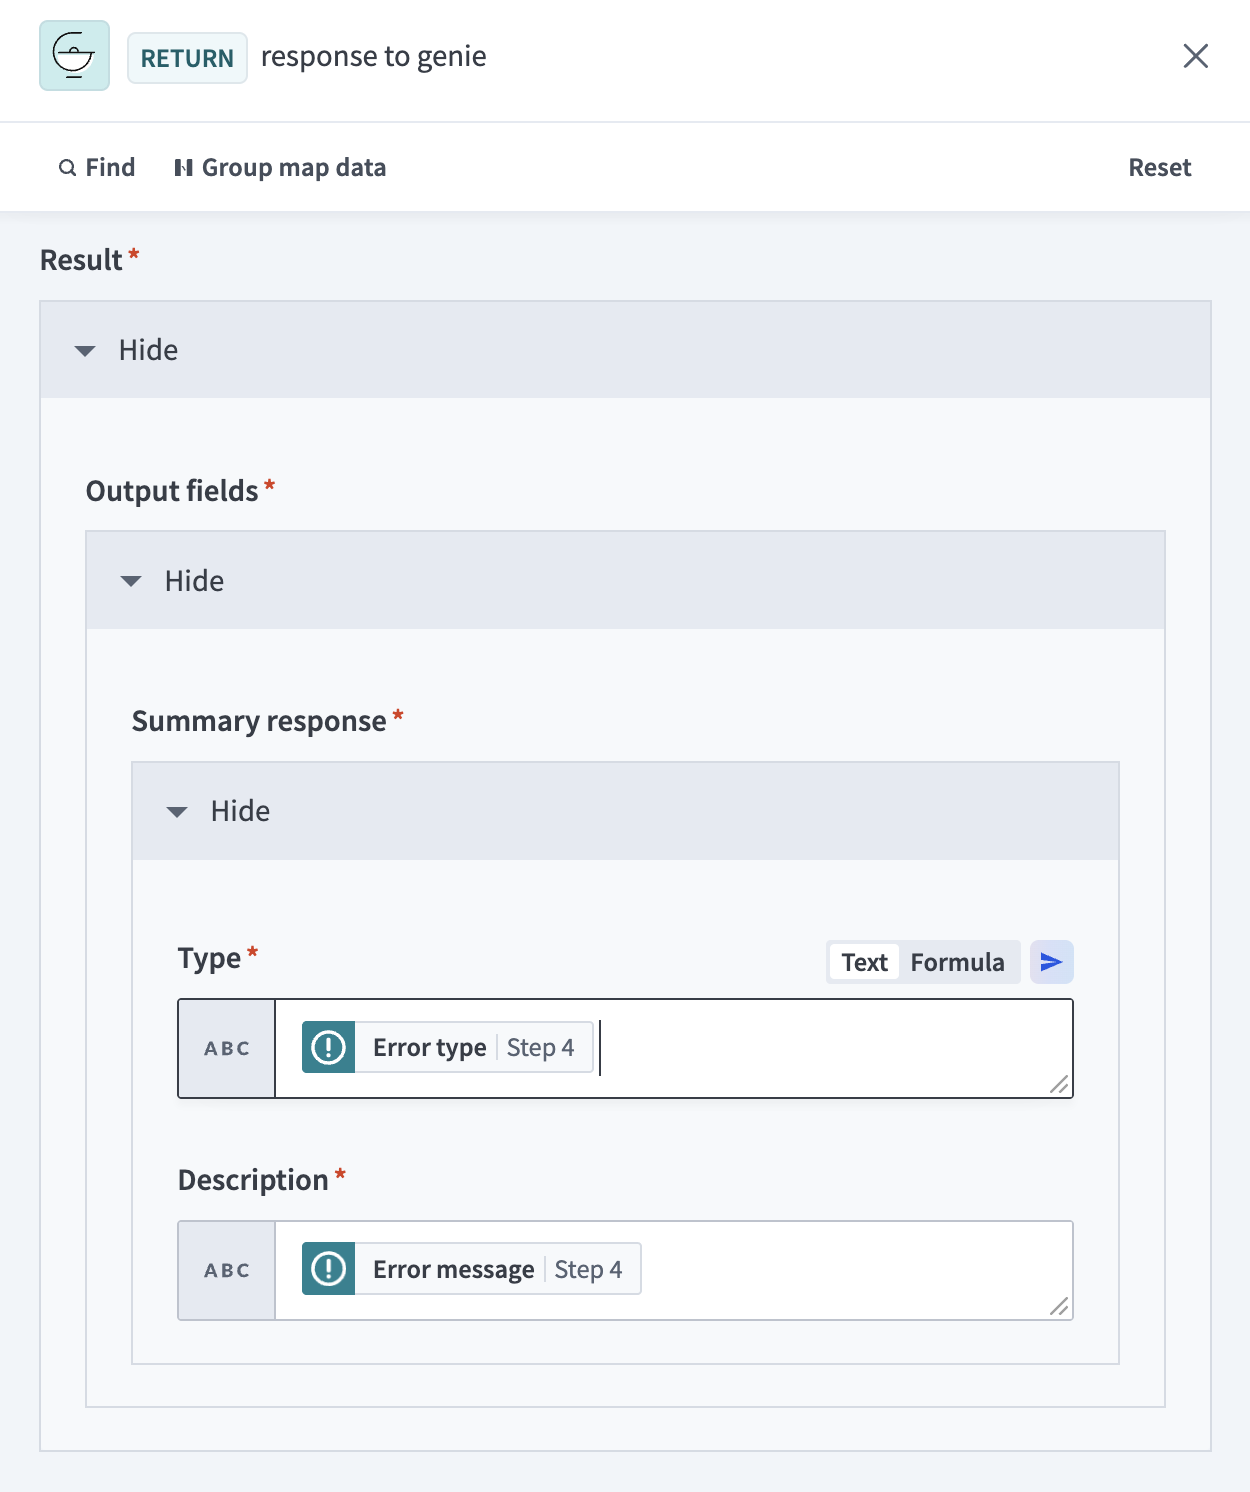 Map the error information
Click Save.
Go to the No branch. The Return response to genie action should already be present.
Click the Return response to genie action to open it.
Map the Type Step 1 datapill to the Type field.
Map the Description Step 1 datapill to the Description field.
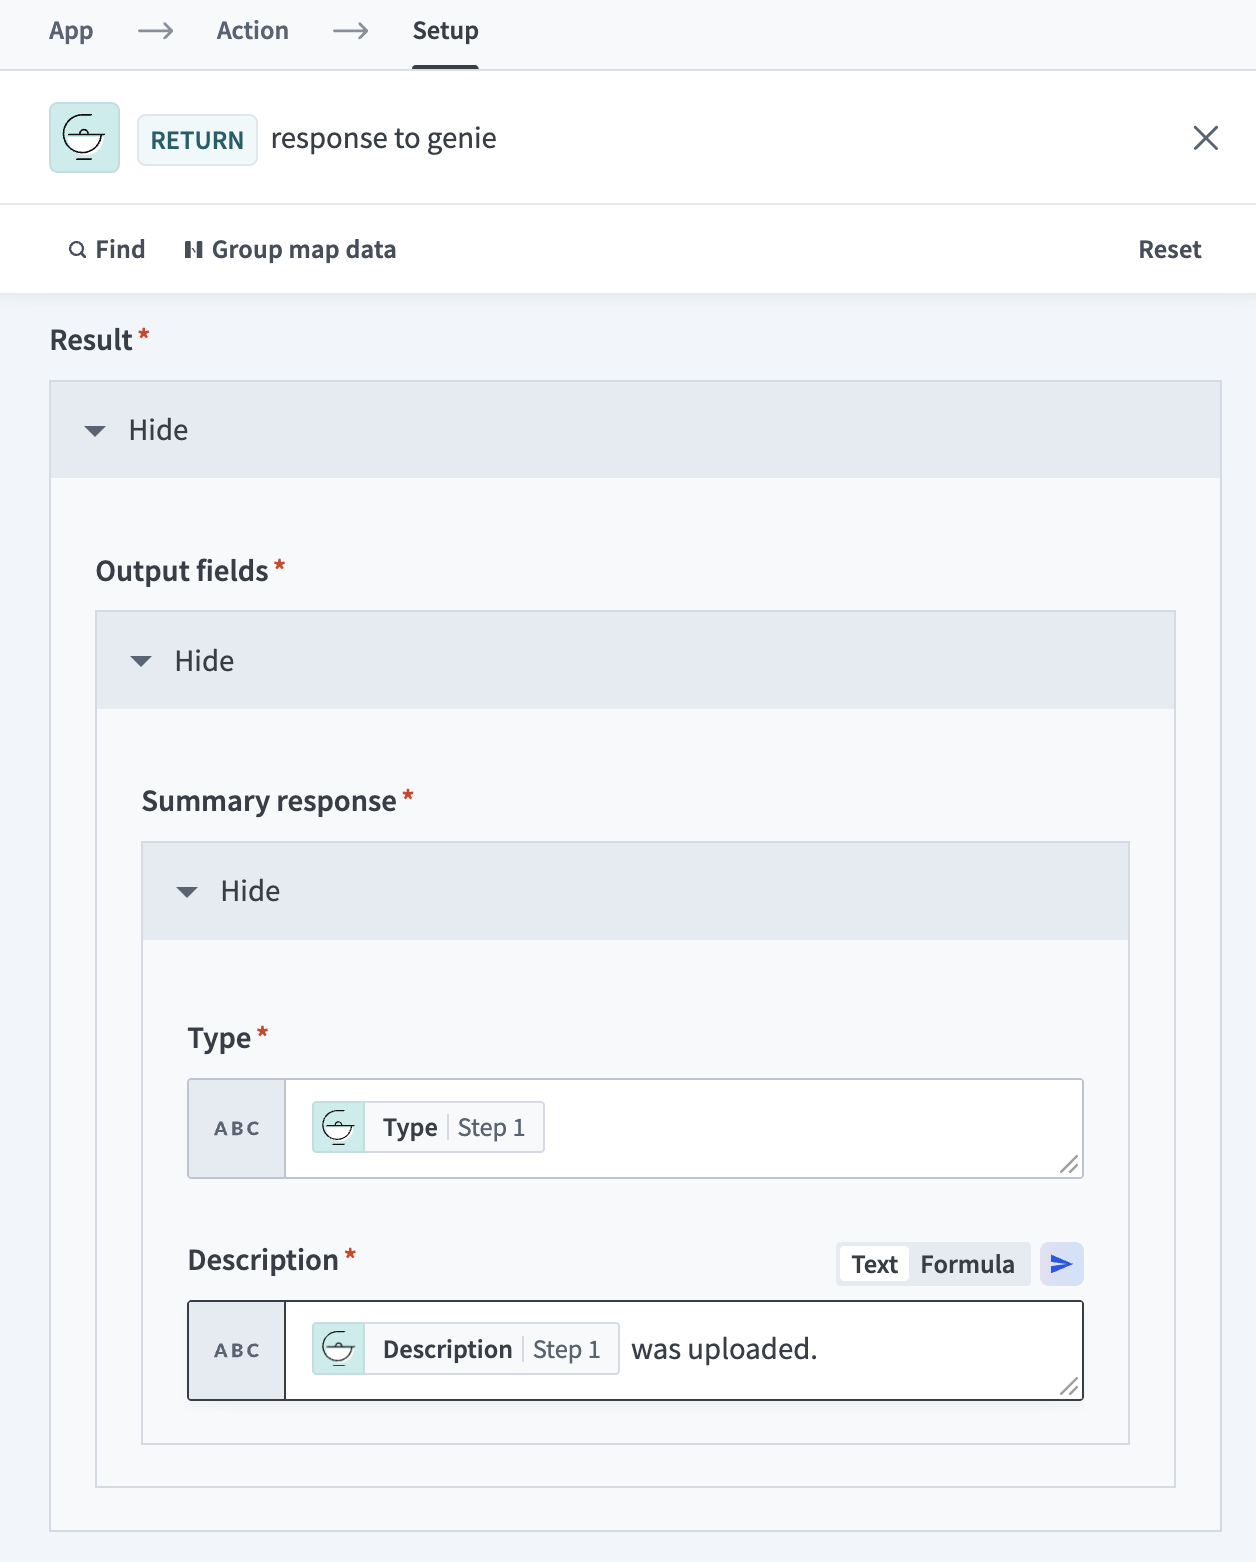 Map the response information
Click Save.
Example genie recipe configuration
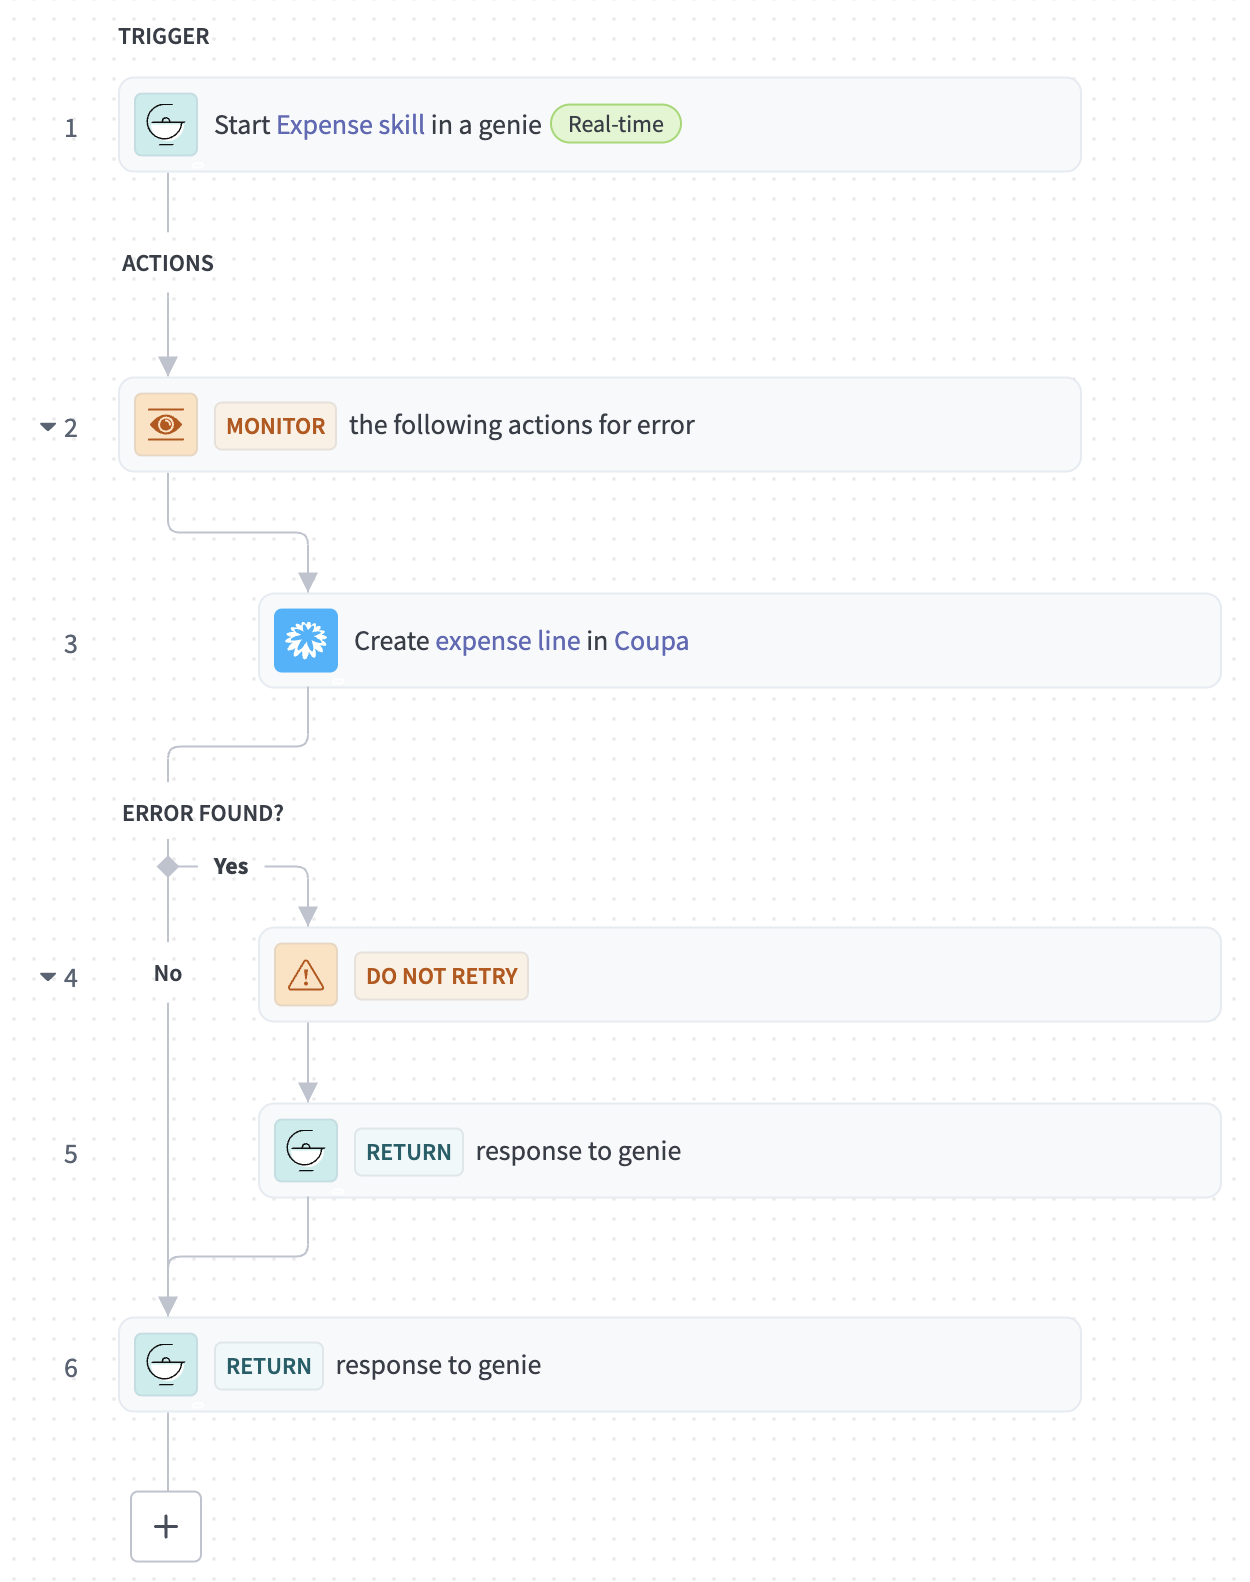 Configured genie recipe example
Last updated: 3/10/2026, 6:40:16 PM